Issue:
How to use Microsoft SQL 2017 Always On Column Encryption?
Environment:
Windows, MS SQL 2017, SSMS 2017, Visual Studio 2019
Resolution:
Follow these steps to get unencrypted value with different tools.
Step-by-step instructions:-
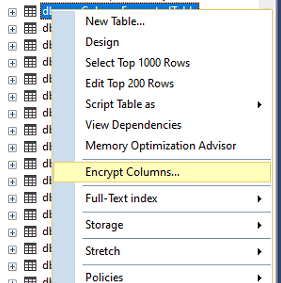
Setting Up Encrypted Column on a Table
- Right click on a table and select “Encrypt Columns…”
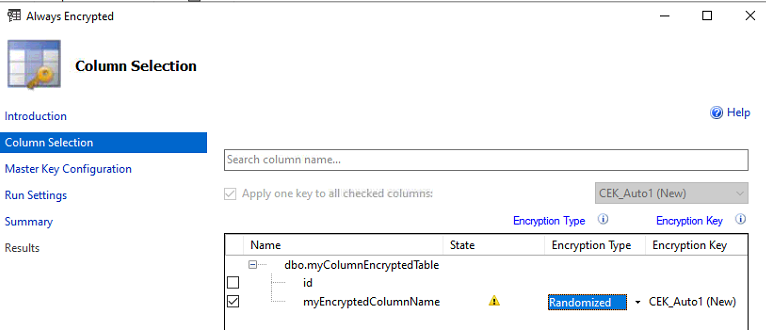
- Depend on what type of column, choose “Randomized” if possible for better security
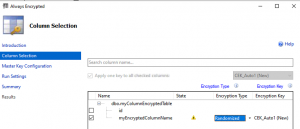
- Select default for other values

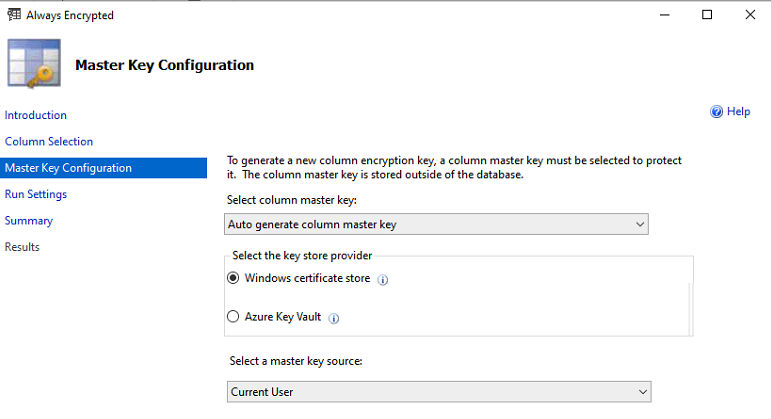
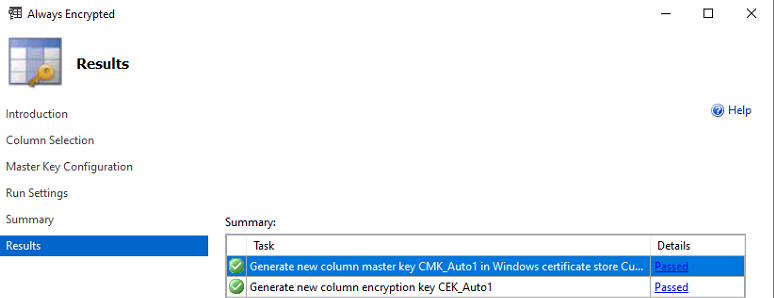
- Follow the screen instructions and finish with successful message

- You keys are created and column is ready to store encrypted data.
- See next section for inserting and retrieving data.
Insert Value into Encrypted Column with SSMS 2017
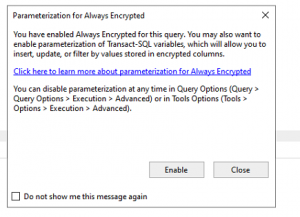
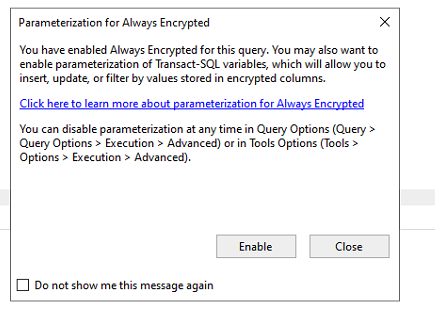
- Enable Query Parameterization on SSMS
- Insert Query with parameter for encrypted data
DECLARE @myEncryptedColumnValue char(36) = '09DF3BDF-078E-EA11-A2FA-005056A14182'; INSERT INTO [dbo].[myEncryptedColumnTable] ([myEncryptedColumn]) VALUES (@keyEncrypted) - Select Query to retrieve encrypted data (no special syntax needed, just connection)
SELECT * FROM [dbo].[myEncryptedColumnTable]
Notes:
Make sure your connect to database server is with “Column Encryption Setting = Enabled”
Import/Export Encrypted Column Data with SSMS 2017
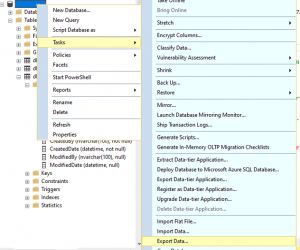
- Right click on DB Name and select Task, Export
- On Choose a Source, select “.NET Framework Data Provider for SqlServer”
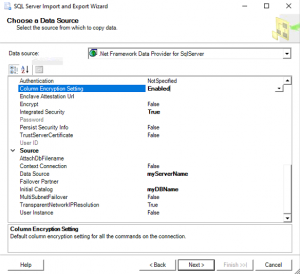
- On the same screen, select Enabled next to “Column Encryption Seeting”, Select True next to “Intergrated Security” if you’re using that, enter [myServerName] next to “Data Source”, and [myDBName] next to “Initial Catalog”.
- On Choose a Destination, select “.NET Framework Data Provider for SqlServer”
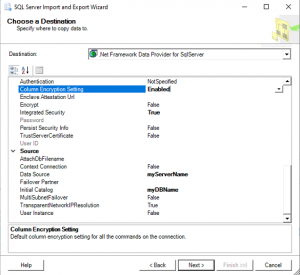
- On the same screen, select Enabled next to “Column Encryption Seeting”, Select True next to “Intergrated Security” if you’re using that, enter [myOtherServerName] next to “Data Source”, and [myDBName] next to “Initial Catalog”.
- Check you destination encrypted column.
Notes:- Make sure your connect to destination server is with “Column Encryption Setting = Enabled“
- Make sure you created destination keys using the same keys you created on source database.


Permission Needed for User Other Then db_owner
- Create a database role and assign role to user
CREATE ROLE [ReadEncryptedColumn] AUTHORIZATION [dbo]
GO
GRANT SELECT ON [dbo].[myColumnEncryptedTable] TO [ReadEncryptedColumn]
GO
GRANT VIEW ANY COLUMN MASTER KEY DEFINITION TO [ReadEncryptedColumn]
GO
GRANT VIEW ANY COLUMN ENCRYPTION KEY DEFINITION TO [ReadEncryptedColumn]
GO
- Notes:
- Make sure user connect to destination server with “Column Encryption Setting = Enabled“
Troubleshoot:
Testing Encrypted column with PowerShell
#seeing encrypted value
$serverName = "myServerName"
$databaseName = "myDBName"
$strConn = "Server = " + $serverName + "; Database = " + $databaseName + "; Integrated Security = True"
Invoke-Sqlcmd -Query "SELECT TOP(10) * FROM myColumnEncryptedTable" -ConnectionString $strConn|
format-table -AutoSize

#seeing unencrypted value
$strConn = $strConn + "; Column Encryption Setting = Enabled"
Invoke-Sqlcmd -Query "SELECT TOP(10) * FROM myColumnEncryptedTable" -ConnectionString $strConn|
format-table -AutoSize
Reference: